(Another) Fresh Start

So Posterous is dead now.

Fortunately, they were fair about this terrible deal and gave a nice heads up, complete with a backup solution to migrate my blog content.

Not that there was much content there anyway, which is the exact reason for this new post here. With “dotfile”, I’ve managed to neglect yet another blog, which is idiotic and inexcusable really. I mean, I did have fun writing some of the posts here, and enjoyed having this playground which is more technology-oriented, so, what gives?

Anyway then, here is to another go.

For now, this blog uses Octopress (a framework for Jekyll) and is hosted on GitHub.
I say “for now” because, while both Octopress and Jekyll are two pretty cool pieces of software, and are very nice to study from and play around with, they just don’t sit as tightly as I’d like a blog engine to. It’s a feeling thing. And admittedly, this might be resolved by more tweaking and configuring to get everything to my taste.

So, let’s do this.

image

(Yes, this post was just here to separate the old blog’s content from the new site. No real announcement.)

It’s Midterms Time (Already?!)

I’ve been very busy in the past couple of months. It’s been very educating, very productive - yet the time flew way too quickly!

Outside of my GSoC Pygame project, I have been finishing the semester and stepping into a final tests period which proves to be the hardest yet. I don’t remember ever being so exhausted day after day when I get home.

This is the main reason I have to admit that my project doesn’t quiet meet the plans to have most of the new Sprite class ready for the midterm evaluations.

Still, I have some good progress to show for, plus I’m fairly sure that after these hectic finals will pass, I will be able to catch up with my plans.

Let’s show off, then.

The sprites work plan consisted of adding 7 new features to Pygame’s Sprite class.
I wrote about implementing 2 of these (Anchor points and Better positioning) in my last post, Baby steps with Pygame sprites.

Since then, I have finished implementing 2 more, Visual attributes and Aggregated Sprite, which I’ll describe below, and also wrote most of the underlying code needed for the rest of the features.

You can check out my work in progress, including everything described here, in the pygame-sprites GitHub repository.

New visual attributes

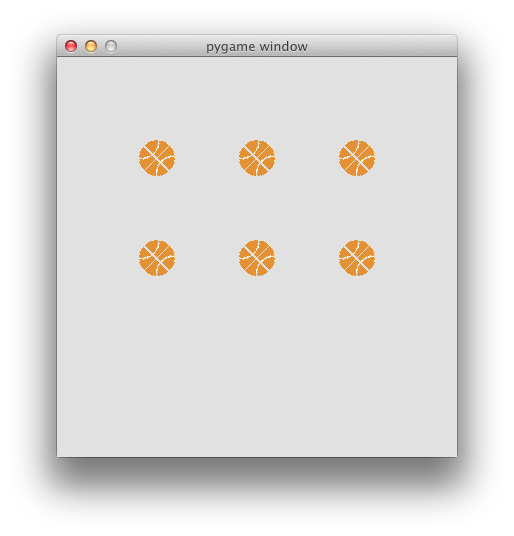
My Sprite class now has several few new properties: visibility, scale and rotate, which control the way the sprite’s image is drawn on the screen:

  • visibility decides whether the image should be rendered or not. Default is true.
  • scale is a float value determining the ratio between the size of the originally supplied image and the required size on the screen. Default is 1.
  • rotate is an integer defining the degree by which to rotate the original image. Default is 0.

image image image

To implement these attributes I used Python’s property notation, which allows me to set custom getters and setters for standard class properties.
In addition to the visual attributes, the sprite’s image attribute also uses the new notation, so that its custom getter function would return the transformed image, if a transformation is needed.

The visual transformations are done using Pygame.transform’s methods.

Sprites drawing themselves

In order to support features such as the visibility attribute, automatic dirty rendering and others, I changed the way we actually draw the sprites, implementing the composite pattern.
Sprite’s new method draw gets a surface as an argument and is responsible to draw the current sprite onto it.

Group’s old draw method now uses the group’s sprites’ draw method if it’s available. Legacy code is still supported by preserving the old functionality if no draw method is found.

Aggregated sprites

I wrote a new class, AggregatedSprite, which extends my Sprite class and adds the functionality of holding a list of child sprites and propagating any change to them.
In a sense, an aggregated sprite is something between a sprite and a sprites group.

The AggregatedSprite class has a sprites property which holds the list of child sprites. This is a basic Python list which could be modified normally.
Its draw method calls all of the child sprites’ draw, like a group.

Setting a value to a visual attribute of an aggregated sprite would propagate this value down to all the child sprites.
This was done in Sprite by wrapping the visual attributes’ setters with a method that would call an on_visual_set callback if one exists.
AggregatedSprite uses this callback to set the make the same attribute change to all the child sprites.

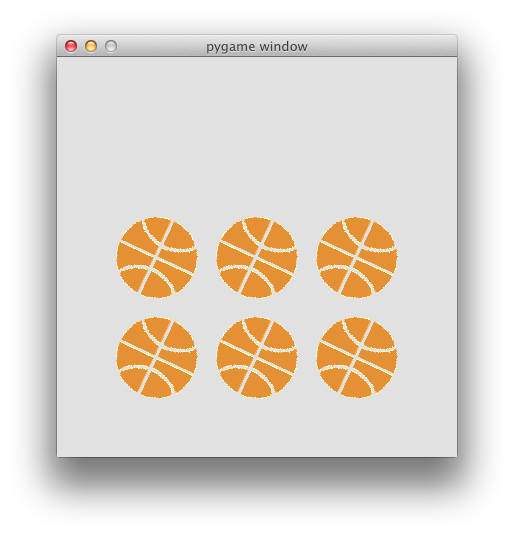
Setting an aggregated sprite’s position to (x, y) would use these values as offsets for all of the child sprites, that is, move them all from their original position by (x, y).

image image image

Still missing

I’m still missing 3 features here: Automatic dirty rendering, Sprite picking and Smarter layers.

The move to composite drawing of sprites holds most of the major changes needed for dirty rendering and layered groups, and so there’s little work left for these two to be done as well.

I still have to do some research on implementing Sprite picking, but I’m sure it will be pretty simple to do.

Also, tests.
Early on, I saw that going full TDD is slowing me down, and I wanted to get stuff working as soon as possible. So I ditched writing tests until everything is more stable.
On of my most important tasks once I’m done with my last final would be to write tests for all of my changes.
This is a big task, but hopefully I could make use code of the demo games I wrote for each feature.

Some other TODOs:

  1. Anchor points: Use Rect’s anchor constants instead of my own.
  2. Anchor points: Handle negative values.
  3. Positions: Handle float values.
  4. Visual attributes: Add crop rectangle attribute.
  5. Some code cleanup, and way more documentation.

That’s about it.

I can’t wait until I’m done with my finals so that I can take this project to the next level (and the one after that, too).

Oh, one more TODO note to self: Blog about the project more. It helps.

As always, feel free to contact me with any question or idea, either here, by email or on #pygame in Freenode.

Baby Steps With Pygame Sprites (Anchors and Positioning Done!)

It has been pretty difficult getting things done in the past week or so, for various reasons (excuses include my birthday, the start of the finals period and some pressure at work).

Initially I was trying at doing unit tests for my planned sprites work, in the TDD tradition. This proved to be a major creativity block for me, I’m guessing mostly because I’m not too experienced with writing tests.
So eventually, I decided to take another approach and just get stuff done in a way that could be quickly presented and tweaked.

Today, I managed to get 2 of the planned features ready to be played around with: Anchor points and Better positioning. In addition, I have a simple demo app that showcases the use of these 2 features.

The new Sprite class is based on a flat-out copy-paste of the original Pygame Sprite class, along with the relevant additions:

  • An anchor property that will be used for positioning and modifying the sprite. It can be set at any point during the game to either:
    • ANCHOR_TOPLEFT
    • ANCHOR_TOPRIGHT
    • ANCHOR_BOTTOMLEFT
    • ANCHOR_BOTTOMRIGHT
    • A custom (x, y) tuple relative to the sprite’s rectangle coordinates.
  • An anchor_value method that returns a tuple of the calculated value of the sprite’s anchor at a given moment.
  • A position proprety consisting of (x, y) coordinates that, when set, uses the sprite’s anchor property to position the sprite on the screen.

The usage of the new features is demonstrated in the regions.py demo.
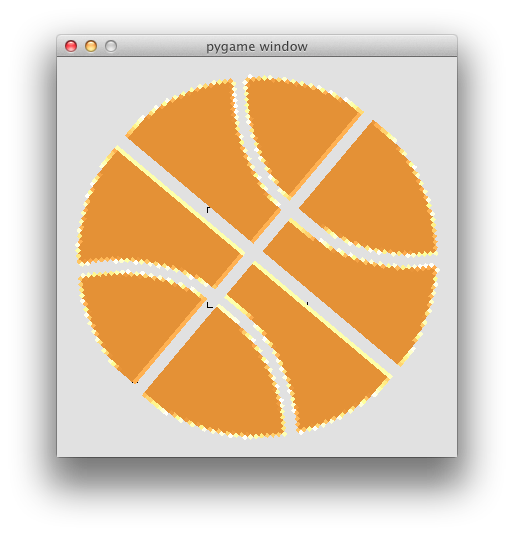
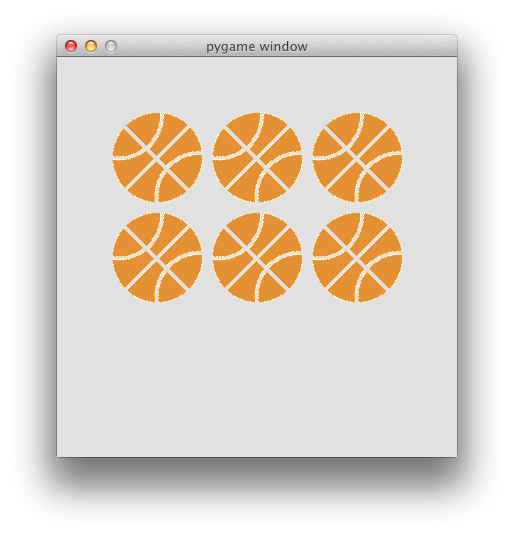
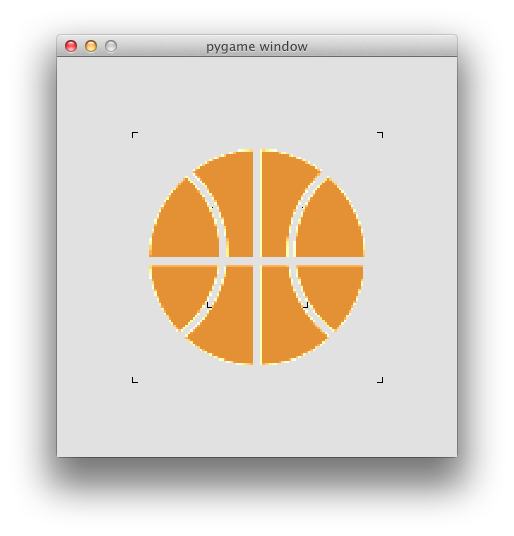
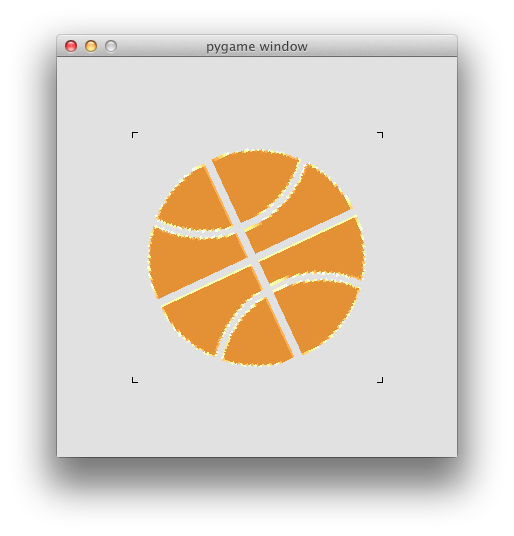
The demo starts out with a basic grid in which you can move a basketball sprite around with the arrow keys: Demo with TOPLEFT anchor During the game, you can use the a, s, d keys to switch between TOPLEFT, CENTER and (25, 20) settings for the anchor, respectively. Demo with CENTER anchor

This is basically it, for now, but I’m pretty satisfied with this small development, as it was integreated easily enough and shouldn’t be breaking any legacy uses of the Pygame’s Sprite classes.

The work is maintained in the pygame-sprites repository.
Please feel free to check out the code and the demo app and send any relevant feedback my way.

I hope to be able to show further progress by the next weekend.

Pygame: Planned Sprites Work

As a final step before getting busy with refactoring and reorganizing Pygame’s sprite classes, I’ve composed the following short paper describing what I want to get done on each 7 new features planned for this part of the project.

These decisions are based on feedback and suggestions posted on the discussion list and on the #pygame IRC channel, and also on my private research of other open-source game libraries: cocos2d, Pyglet, Spyral & Gloss, among others.

This isn’t a finalized spec of course, just my way of listing things I want to take care of, and along the way getting feedback from the community.

As always, feel free to contact me with any suggestions or comments.


1. Anchor points

The Sprite object should have an anchor attribute, that could be set to either:

  • (x, y) representing an offset
  • One of a set of predefined flags i.e. CENTER, MIDBOTTOM, TOPLEFT, that would remain appropriate even after transformations (scaling, rotating, etc).

The default value would be TOPLEFT.

The anchor attribute represents a point in the sprite that is used when moving and transforming the sprite.

So for example, if a sprite’s anchor is (10, 20) and we move it to (100, 100) - then in result the anchor pixel would be positioned in (100, 100) - meaning in fact, that the sprite’s top left coordinates are (90, 80).

2. Better positioning

Positioning sprites is currently done by manipulating the sprite’s rect attribute.

It should be possible to position a Sprite object using a tuple (x, y) that would have the same effect.
The tuple would be used in accordance with the sprite’s anchor point, as defined above.

The x and y values should be able to be float values, to allow for varying speeds; For example, moving a sprite by 0.1 pixels every frame and then the sprite would move 1 pixel every 10 frames.
The actual rendering would use rounded values.

3. Visual attributes

A sprite should have several attributes that affect its visual representation, and could be changed dynamically during the run of the game.

  • Visibility: A boolean to say whether the sprite should be rendered at all. Default is true.
  • Scale: A float defining the aspect between the sprite’s original size and what should appear on screen. Default is 1.
  • Rotation angle: A float representing the degree the sprite should be rotated with. The rotation is done around the anchor point. Default is 0.
  • Crop rectangle: A rect value with coordinates relative to the original sprite image, defining the part of the image to render. Default is ((0, 0), (w, h)), with w and h being the image’s width and height values.

4. Smarter layers

A Sprite object should have a layer attribute, with an integer value representing the layer’s z-index.
This is actually already done in DirtySprite and LayeredUpdate. We should have it for every sprite.

Rendering sprites should behave as in LayeredUpdate, maintaining a list of sprites ordered by their z-index.

5. Aggregated sprites

A new class AggregatedSprite extending Sprite that holds a list of other Sprite objects.

They are all positioned and rendered regularly on the screen, and the AggregatedSprite instance could be used to manipulate them together:

  • Setting the AggregatedSprite’s position to (x, y) would use these values as an offset for positioning its sprites.
  • Setting a value of one of the visual attributes would use this value to overwrite the same attribute for the sprites.

6. Sprite picking

The screen should have a method to pick sprites by coordinates - that is, given a position (x, y) it should return a list of all sprites rendered at this point.

  • Optional: Pass a flag to only pick visible sprites (visible = true).

7. Automated “dirty” rendering

All of the sprites and sprite groups should have the dirty rendering functionality of DirtySprite and LayeredDirty.

Sprites should label themselves dirty automatically as soon as either their position, image, or any other visual attribute were changed.
This would then cause them to be re-rendered only when necessary.

GSoC Journal: Weeks 1-2

With the first 2 weeks of the GSoC coding period over, I thought I’d post about what I’ve been up to so far.

The start of the coding period took me by surprise. I had to learn about it from a post in the Google Open Source blog.
I had to re-adjust and flex my schedule to get into working mode, and that wasn’t too easy. That’s why I’m a bit late with my progress, compared with the timeline I described in my application. Nothing that I won’t be able to fix later on, though :)

So in the past 2 weeks I was able to:

  • Read through some of the Pygame source, study the basics that get it going.
  • Specifically read through sprite.py to understand the current state of the sprites system.
  • Set up my development environment so that it actually runs the framework and tests successfully.
  • Read through most of Making Games with Python & Pygame, going over the examples code.
  • Checked out a few of the example games, playing around with their source code.
  • Studied the DirtySprite and LayeredDirty classes and their use case.
  • Wrote a DirtySprite and LayeredDirty tutorial. This was extremely helpful in learning to use the feature. Great idea from mentor illume.
  • Sent a Call for Suggestions to the mailing list regarding my planned features list for the sprite classes. Got tons of helpful feedback from the community.

The last step helped me compose the following first draft of a sprites system features list:

  1. Better positioning, using float values.
  2. Anchor points.
  3. Visual Attributes:
    • Rotation angle
    • Scale
    • Crop rectangle
    • Visibility
  4. Smarter layers system.
  5. Aggregated sprites.
  6. Sprite picking.
  7. Automated “dirty” rendering.
  8. Encapsulating the Collision Detection code.
  9. Optional: Animation? Events?

Again, this is just a first draft and all of the items are still in discussion and under consideration.
If anybody that’s reading this here has any ideas for new features or notes on any of the items here, please feel free to write to me, either here, in the mailing list or via email.

What’s next?

As a lesson from last year’s GSoC, that I also had to start while a semester was still going, I decided on a little system:
Every weekend, after summing up what I’ve been up to so far (i.e., this post) - I will decide on tasks for the next week in a specific format: A list of 4-5 minor tasks and one major task.
This way, I’ll be able to finish the small tasks during the week, when I get back home from school or work. The large task would be done during the weekend.

So, this week I’ll:

  1. Blog about the 2 weeks and what’s next.
  2. Research some of the features from the list (italic above; items 2, 4, 5, 6);
    • What exactly is required?
    • How is it done in other libraries?
    • How should we do it?
  3. Weekend task: Start writing a paper defining the sprite project work, describing the features that would be implemented.

Have a nice week!

Quick & Dirty: Using Pygame’s DirtySprite & LayeredDirty (a Tutorial)

Knowing how to use Pygame’s various sprite classes is essential to getting good and efficient results when working on Pygame games.

Every computer game is made out of a loop that’s constantly re-validating the input and the game data and refreshing the display accordingly. In fact, whenever I read the source code for a game I’m surprised by how many tasks get done on each iteration, that is, dozens of times per second.

You can imagine that drawing things on the screen is one of the heavier tasks, and that’s where the DirtySprite and LayeredDirty classes come in. By using these two instead of the regular Sprite and Group classes, you can keep track on what parts of the screen need a refresh and what don’t, and in turn, your game renders in a smarter and more efficient way.

In this short tutorial, I will show you a very basic use case for DirtySprite and how I implemented it in an existing game source.

The full source code for the tutorial, as well as a diff for each step, are all available to browse in the dirty_chimp project on GitHub.

Pummel The Chimp

As a simple basic game, we are going to use chimp.py, an extremely basic game based on the infamous “Win $$$” banner ads of the 1990s.

Pummel The Chimp, And Win $$$

The game comprises of an image of a chimp that’s quickly floating from right to left, and a fist image representing the user’s mouse cursor trying to punch it.

Writing this game is described in Pete Shinners’ Line By Line Chimp tutorial, in case you need to wrap your head around basic Pygame principles. Its original source code is available under examples/chimp.py in the Pygame distribution.

There are two sprites used in this game: The chimp and the fist.
The chimp is always undergoing a change, either in its position (running around) or its angle (spinning when punched).
The fist follows the cursor movement, if there was any, and on a click event, it is lowered by a few pixels for a second, to simulate a hit.

The dirt

Using DirtySprite

First things first, we’re going to use the DirtySprite class for both sprites. Of course, DirtySprite is a subclass of Sprite, so this change would have no effect for now:

#!python
class Fist(pygame.sprite.DirtySprite):
    def __init__(self):
        # call DirtySprite initializer
        pygame.sprite.DirtySprite.__init__(self)


#!python
class Chimp(pygame.sprite.DirtySprite):
    def __init__(self):
        # call DirtySprite initializer
        pygame.sprite.DirtySprite.__init__(self)

Voila, Fist and Chimp are now DirtySprite

Now, if we’re going to keep the source as it is, the sprites would disappear immediately after first appearing. That is because we’re going to make the rendering be dependent on their dirty flag (that is, they will only be updated if they have dirty = 1).

So to prevent this, for now, let’s keep both of them always dirty after an update.
Add this to both classes:

#!python
def update(self):
    ...
    self.dirty = 1

Note that as we mentioned before, the chimp is always either moving or spinning. That means we can have it always being dirty. So we’re basically done with it!

Grouping the sprites

Now, in order to use the special dirty-rendering logic, we will need to use LayeredDirty, which is a group class for holding and handling multiple dirty sprites.

We’re going to use it instead of the regular RenderPlain (right before the main loop):

#!python
allsprites = pygame.sprite.LayeredDirty((fist, chimp))

Now comes the dirty drawing logic:
Instead of drawing everything to the screen and using flip to replace the screen content every time, we will use LayeredDirty’s magic at the end of each loop iteration:

#!python
# Draw Everything
screen.blit(background, (0, 0))
rects = allsprites.draw(screen)
pygame.display.update(rects)

So we store the group’s draw results in rects, which is basically only the areas of the screen that needs re-rendering. When passing these to update, we get exactly what we wanted.

And, because we keep adding to the screen and not necessarily re-drawing it, we’re going to need to tell the LayeredDirty instance how to clear previous data, that is, it’s going to use our predefined background when it clears parts of the screen. Let’s add this line right before the main loop, after assigning to allsprites:

#!python
allsprites.clear(screen, background)

We should be able to run the game now. But we want to be smarter about drawing the fist sprite.

Re-thinking Fist’s rendering

Now, this is all nice but we want to be smarter about dirtying up our sprites.

Let’s do that with Fist: Of course we’ll still need to re-draw it whenever the user moved it (with the mouse cursor) or punched (using a click). But in any other case, i.e., when the mouse does not move, there’s no need to change the Fist object.
So, let’s change update, which currently handles every iteration the same (and sets dirty to 1).

We’re going to move everything that’s related to following the user’s mouse to a new method, move:

#!python
def move(self):
    "move the fist based on the mouse position"
    pos = pygame.mouse.get_pos()
    self.rect.midtop = pos
    self.dirty = 1

And update would just have to handle the punch animation, when necessary:

#!python
def update(self):
    "handle the punching fist position"
    if self.punching:
        self.rect.move_ip(5, 10)
        self.dirty = 1

As you see, we haven’t changed update’s code at all, apart from splitting it into 2 functions and adding self.dirty = 1 when something changed. This would tell LayeredDirty to return the sprite’s rect as something that requires rendering.

So now, whenever the user clicks the mouse, self.punching is going to be 1 (as defined in the punch method) and later on, update will change the sprite accordingly and mark it dirty.

We just need to add a hook to the mouse motion event, so that we’ll call move whenever the mouse is moved. Let’s add these two lines at the bottom of the event handling block:

#!python
elif event.type == MOUSEMOTION:
    fist.move()

Some final tweaks

We’re done with most of the work. There are just a few small issues to address at this point:

First, notice that even though we’re using the smarter dirty rendering now, we’re still re-rendering the background image on every loop iteration:

#!python
# Draw Everything
screen.blit(background, (0, 0))

This is useless, because we already set our LayeredDirty to clear with background.
So you can go ahead and remove that line altogether, we don’t need it anymore.

Now, we have another small bug after a punch is made (i.e. a click event): The Fist sprite is lowered down in the screen, but never goes up. In the older code, it’d fix its position in the next iteration by following the user’s cursor again. But in our code, if there was no mouse motion event, we don’t bother updating the sprite.

We can fix that by calling move after a punch is finished, that is, at the end of unpunch:

#!python
def unpunch(self):
    "called to pull the fist back"
    self.punching = 0
    self.move()  # reset to mouse's position

And finally, if you run the code we have so far you might notice that the chimp image can get on top of the fist sprite! That looks strange and unwanted.
Fortunately, we can fix that by ordering the sprites we pass LayeredDirty, so that the chimp sprite is always rendered first:

#!python
allsprites = pygame.sprite.LayeredDirty((chimp, fist))

Now it all looks good.

And we’re done.

This wasn’t so difficult, was it?
Running the code now would render exactly the same game as the good old chimp.py.

Yup. Exactly the same game.
But - we were able to learn along the way, and get to know DirtySprite and LayeredDirty which are two classes that could provide a great deal of help in our future works.

Also, comparing the new game with the original version, I managed to see a slight improvement in performance: CPU percents were cut down from 5.5% to about 5.0%, and the process’ threads number was fixed on 4 instead of around 5-7.
These are indeed extremely small changes, but keep in mind that (a) our example game is very simple as it is, and (b) it’s not the most classic example, as we have the chimp sprite that’s always dirty and re-rendering.
Still, I think that’s pretty cool.

You can find the full code of this tutorial under the dirty_chimp project on GitHub.
The code for each step was posted at a separate commit, so you can check out the process in the project’s Commit History page.
Introducing the Pushbag Jar

We use Bazaar for version control in Waze, mainly for legacy reasons. We don’t like it that much (compared to Git), but it’s working.

However, as our web team is growing, we find ourselves struggling over and over again to understand why something that worked a few minutes ago (before the merge) doesn’t anymore.

The thing is, it’s usually somebody’s fault. And that person should be educated. Instead of straightforward educating, we decided to go with humiliating. Much more fun this way.

Thus came The Pushbag Jar, modeled after New Girl’s Douchebag Jar. We wrote down a few basic, civil rules, that if you break them - you have to pay, and also move the jar to your desk, so everyone beholds your pushbaggery.

You can see our rules list on this page.
We haven’t decided on what to do with the collected taxes yet, but I’ll let you know if it’s something funny. 

Google Summer of Code 2012: Applying for Pygame

While I’m fully aware that I haven’t posted here for more than six months, I’m going to completely ignore this and carry on. Hope that would work.

\*

Google Summer of Code is a brilliant thing. For those of you who don’t know it, every summer Google uses its influence and many dollars to connect Computer Science students with open source projects, paying students for a 3 months long contribution to an accepted open source project.

Students win, because they gain experience while studying (and also, dollars).
Open source projects win, because they can get a lot done during the summer, and ‘recruit’ new contributors.
Open source wins, because more young students are familiar with it and the way it works.
Google wins, because it can’t ever lose.

During the 2011 summer I’ve participated in GSoC, developing a Maltese-Hebrew machine translation module for the Apertium open source translation toolkit.
It was a lot of fun and a whole lot of work. I learned an absurd amount of stuff about computational linguistics, text manipulation, Python work and open source projects internals. I’ve worked with some really cool people. And I actually built a machine translation module.

But it was also somewhat overwhelming, merely from a logistic point of view.
You see, even though most GSoC students are internationals, Google’s timeline is set according to that of American schools. So instead of using my summer vacation for the project, I had to start work during my finals period. This wasn’t fun. And for most of the development time, I had to juggle between school, GSoC work, and my dayjob at Waze. This wasn’t fun at all.

Why, then, would I apply again?
My best guess is I’m too much of a nerd, and an open source geek, to miss such a brilliant opportunity.

So here I go again. Last week I submitted my proposal to contribute to the Pygame project.

Pygame is an open source Python library for building games. Yes, actual computer games. With graphics and stories and high scores and all. They’re doing pretty good, and I was actually just checking it out using the new Making Games with Python book when I noticed they’re participating in GSoC this year.

My project proposal is about re-designing and re-writing their Sprite and Scene systems, which are two very basic modules that handle graphics and game workflow.
These are very basic, fundamental modules, which mean a large part of the work would consist of consulting the Pygame community, thinking and designing.

Three reasons I’m hyped about this project:

  1. It’s game development! The reason I got into programming all along! Which is pretty awesome. And also, it’s a lot different than the programming I’m used to, and that’s cool too.
  2. It’s about code design and best practices, which is a part of development I’ve grown to really like. This is a great opportunity to evolve in this field.
  3. It’s about working with a large open source community, and using a lot of feedback. Which is always fun, and very educating.

Two things I’m not so excited about:

  1. It falls on my finals period this year too. So, another month of juggling.
  2. It might not happen at all! Right now my proposal is reviewed by Pygame and The Python Software Foundation and accepted proposals will only be announced on April 23rd. Until then, all I have is suspense.

Last year, I didn’t have any blog set up and I managed my project journal in the Apertium wiki.

So I was thinking, this year, if all goes well, I could use this here blog to tell you (and the Pygame guys) about the progress I’m making and about the many things I’m learning in the process. Could be nice.

So, here’s to that.

Slowing Down jQuery

I wanted to work on adding a nice ‘loading…’ effect to my application, of which I have little access to its server code. I needed to find a way to slow down my AJAX calls, so I can see the effect and tweak it in my browser.

Unfortunately, AJAX is too fast on a local environment, and I couldn’t find anything about slowing jQuery down (all Google found were ‘jQuery script too slow’ question pages).

Fortunately, a co-worker and I figured that we could take advantage of the new jQuery Deferred objects.
I added this line to a function that wraps AJAX calls:

And it worked like magic.

It merges the original AJAX’s promise along with something that takes time (i.e. the 3s fadeOut animation), and then uses a deferred pipe to make the promise only return the original AJAX result.

Cool!

You use it like this: